")


SoftPI knowledge database contains documents and articles that describe features, configuration and work with SoftPI software products.
 VoiceNib 2.x. User guide
6.1. Server configuration
To configure VoiceNib server settings, click the Server menu item. An example of the Server page is shown in Figure 6.1.1.
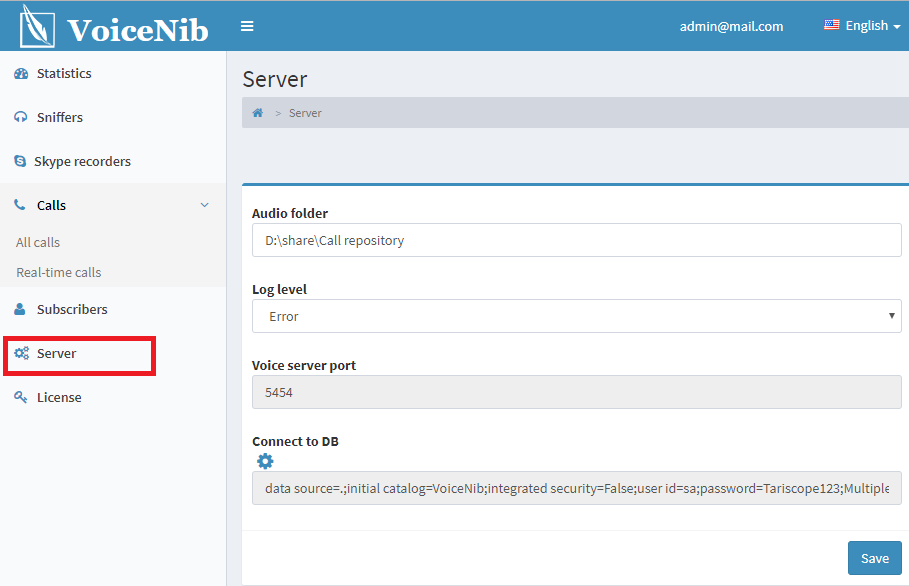
Figure 6.1.1
The page contains the following items.
The Audio folder box is intended to enter a folder name where audio files of recorded calls will be stored.
The Log level list allows you to select the level of logging of the system. The following options are possible, where each next option increases the detail level of logging:
- Status,
- Critical error,
- Error,
- Warning,
- Information,
- Advice,
- Debug.
The log is used to identify the causes of the malfunction of the VoiceNib server. By default, the log file is in the: ...\ProgramData\SoftPI\VoiceNib\. The file name is Server.log
The default level is Error. If you don't have problems with the VoiceNib work, leave the default log level.
If you could not find out the cause of the incorrect operation using this log and fix the problem yourself, send this log to SoftPI technical support.
In the Port box, the IP port of the VoiceNib server, which will receive data from sniffers, is displayed. The default value is 5454. To change the port value, open the file …/ProgramData/SoftPI/VoiceNib/Server.xml, and change the value in the VoiceServerPort tags.
The Connect to DB box displays the connection string to the VoiceNib database. If you need to change parameters of the connection string, click on the icon near the box name. The Connect to DB window appears as shown in Figure 6.1.2.
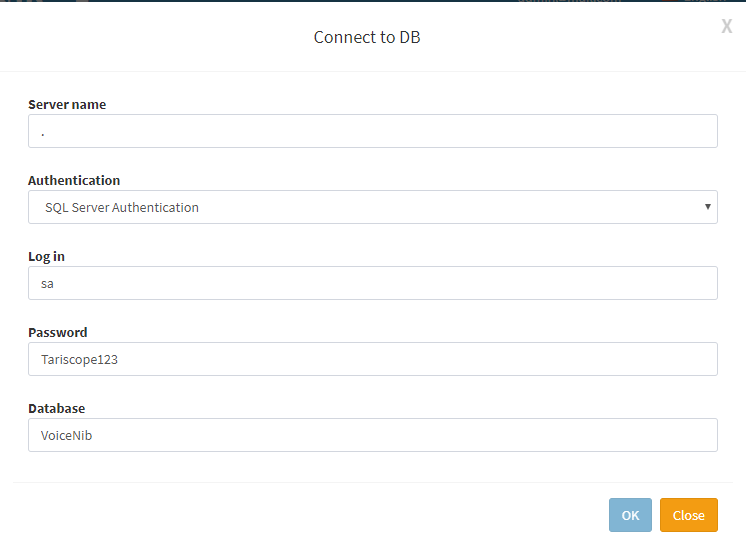
Figure 6.1.2
In the Server name box, enter the server name or its IP address.
In the Authentication list box, select an authentication method to connect to the database. There are two options:
- SQL Server Authentication. If you have selected this option, enter a login and password that will be used to connect to the database in the appropriate boxes.
- Windows Authentication. In this case the login and password will be used that are applied to Windows.
In the Login and Password box you should enter data, if you have selected the SQL Server Authentication.
The Database box displays the database name.
Click OK to save your changes.