")


This page is out of date. Go to the next page.
Before executing the sniffer configuration, it is necessary that the VoiceNib server has already been installed somewhere and it has access to computers with the VoiceNib sniffer over the network.
To configure sniffers, click on the Sniffers menu item. An example of the Sniffers page is shown in Figure 6.4.
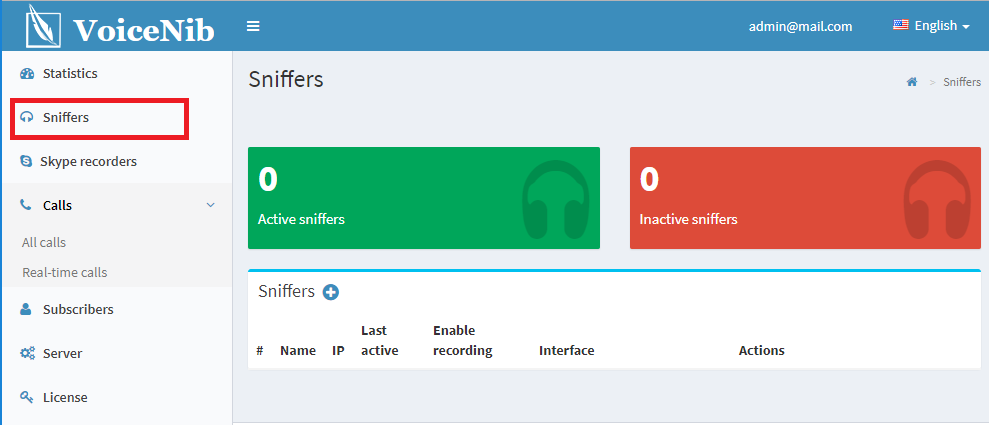
Figure 6.4
Create a new sniffer in the system. To do this, click the '+' button. The Create page for adding a sniffer appears as shown in Figure 6.5.
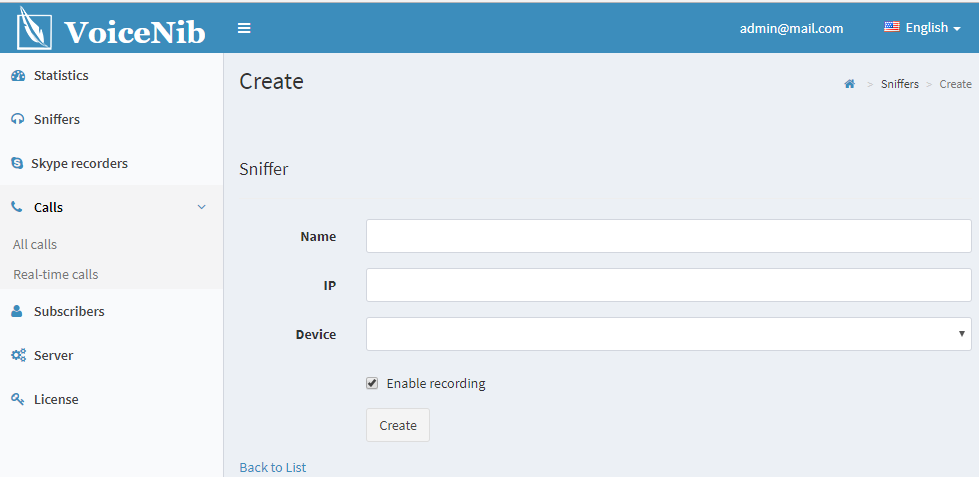
Figure 6.5
In the Name box, enter an arbitrary name that will allow you to identify the sniffer.
In the IP box, enter the IP address of the computer where the sniffer was installed.
If there is a network access between the VoiceNib server and a computer with the sniffer, the list of network interfaces of the computer with the sniffer is displayed in the Device list. Select the interface through which the voice traffic passes.
You can enable or disable the recording of VoIP calls. To do this, use the Enable recording check box. Check the box to record calls.
To save the settings, click the Create button. The sniffer data is reflected in the table (Figure 6.6).
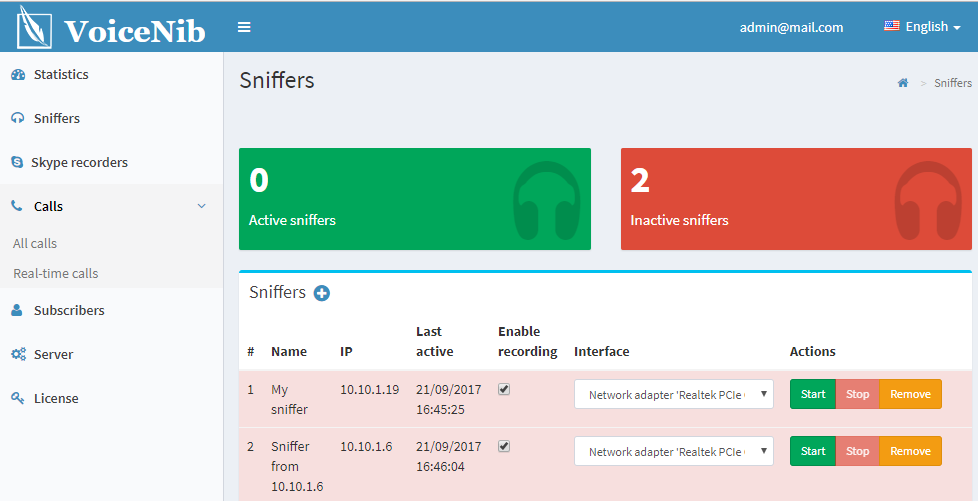
Figure 6.6
All sniffers work as Windows operating system services. To enable the sniffer, click the Start button of the corresponding row of the sniffer table.
To stop the sniffer, click the Stop button.
To remove the sniffer from the list interacted with the VoiceNib system, click the Delete button.
To temporarily disable recording of VoIP telephone calls without stopping the corresponding sniffer service, clear the check box in the Enable recording column.
The sniffer lines that currently are active are highlighted in green.
The sniffer lines that are currently are inactive are highlighted in red.
At the top of the configuration page, information on the total number of active and inactive sniffers is displayed.