")


This page is out of date. Go to the next page.
To install the VoiceNib system, download the installation package from this site. The installation package is contained in the file: VoiceNib.setup.exe.
Copy this file to the server on which all or part of the VoiceNib system will be installed, and run this file. A window appears prompting you to select the installation language. Select the desired language. The installation window appears as shown in Figure 5.1.
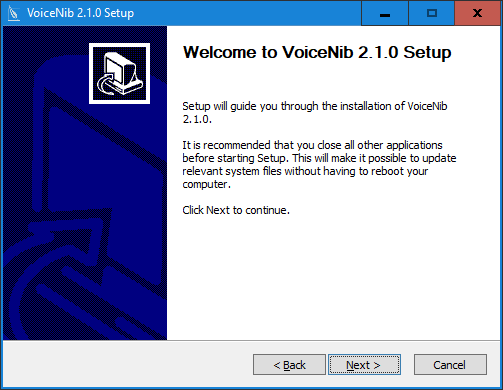
Figure 5.1
Read the contents of this window and click Next. The installation window will be as shown in Figure 5.2.
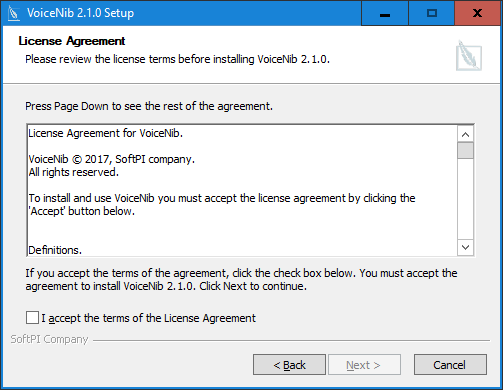
Figure 5.2
This window contains the license agreement. If you agree to the terms of the license agreement, select the I accept the terms of the License Agreement check box and click Next. If you do not agree with the license agreement, click Cancel to stop the VoiceNib installation.
If you choose to continue the installation, the program window will be as shown in Figure 5.3.
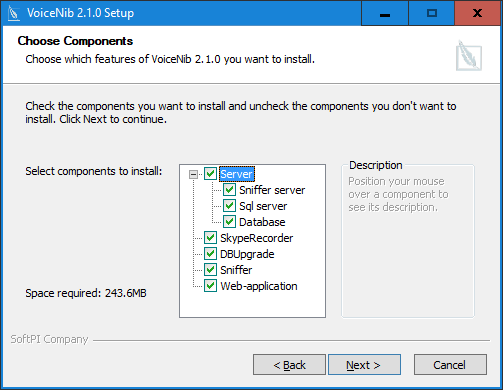
Figure 5.3
This window offers a list of VoiceNib modules for installation. By default, all modules are selected. If you wish to install different modules on several servers, leave only those that are required for the current installation. Consider the purpose of each of the modules that are available for installation:
- VoiceNib server. This is the main module of the system, which ensures the operation of the who;e system. If you install VoiceNib modules on several servers, install the VoiceNib server on only one of these servers.
- SQL server. Microsoft SQL Server 2012 Express edition provides a work with the VoiceNib database. If you already have Microsoft SQL Server, which you want to use for VoiceNib system, do not install this server and clear this check box.
- Database. If you already have the VoiceNib system and you are updating it, clear this check box, otherwise the existing database will be replaced with an empty database from the installation package.
- Sniffer. This module is intended for the detection of packets associated with voice transmission passing through the network interface of the computer. This module should be installed on the server to which the mirrored channel of the switch is directed or to a separate computer on which the software IP telephone is used. You can install several sniffers on several servers (computers).
- Web-application. This is the Web site through which you configure the VoiceNib system and work with it. This Web site should be installed on the computer with IIS.
After selecting the modules required for installation, click Next. The installation window will be as shown in Figure 5.4.
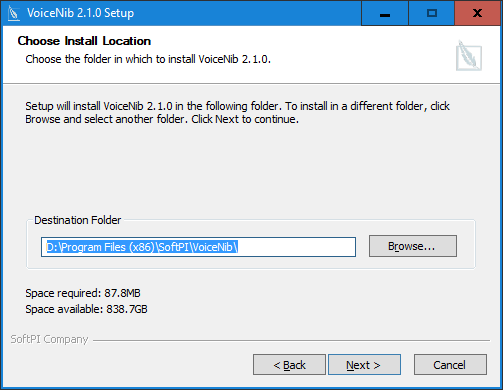
Figure5.4
Select the folder where the VoiceNib modules will be installed. The default folder is …:\Program Files (x86)\SoftPI\VoiceNib\
Click the Next button. The installation window will be as shown in Figure 5.5.
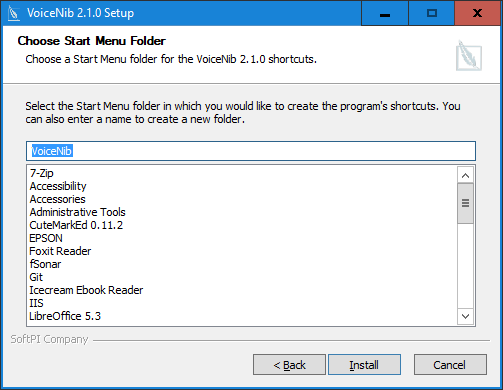
Figure 5.5
Specify the folder name for the VoiceNib system in the Windows Start menu. The default name is VoiceNib.
Click the Install button. The selected modules will be installed.
If you have chosen to install Web-application, after the installation is completed, the Web site installation window appears as shown in Figure 5.6.
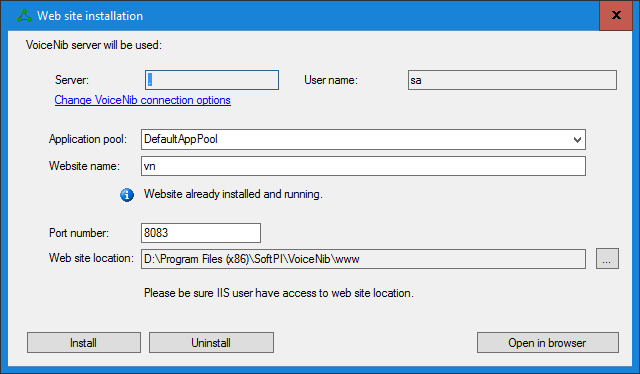
Figure 5.6
Click the Change VoiceNib connection options link. The Connect to database server window appears as shown in Figure 5.7. It is used to set the connection parameters to the Microsoft SQL server that manages the VoiceNib database.
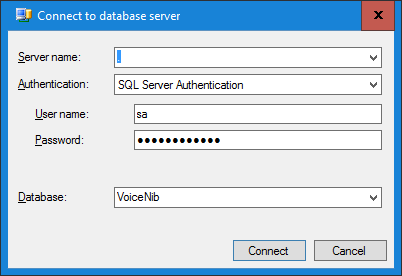
Figure 5.7
The Server name list displays the computer name or ".", which means the local computer. Click on this list and the program will automatically search for the SQL server on the local computer. In case the program finds the SQL server, its name is displayed in this list. Select this name. If the search was unsuccessful or the SQL server is on another computer, you should enter the name of the computer (or its IP address) and the name of the SQL server.
In the Authentication list, choose the desired type of authentication to the SQL Server:
- Windows Authentication,
- SQL Server Authentication.
If you have selected the SQL Server Authentication option, you should enter a name and password of the user whose rights will be used to connect to SQL Server.
If you have selected the Windows Authentication option, the VoiceNib system will use the rights of the Window user to connect to SQL Server.
Click OK. The process of connecting the VoiceNib database to the SQL server starts.
In the Web site installation window (Figure 5.6), in the Application pool list, select the pool in which the website will be run. By default, the value of DefaultAppPool is suggested. If necessary, change this pool to the required one.
The Website name box displays the internal name of the site. The default value is vn. Change this name to another name if necessary.
An access to the site is determined by the port number, which is indicated in the Port number box. If necessary, change the port number.
The path to the site files is indicated in the Web site location box. If necessary, you can change the default value. In this case, it is necessary that the rights of IIS user, which is used to work the site, grant the access to the specified folder.
Click the Install button. The installation process starts.
To configure the VoiceNib system, click the Open in browser button.
Links